The Basics of HTML and CSS: Build Your First Web Page
Code Playground is only enabled on larger screen sizes.
HTML and CSS are the foundations of a webpage, and they are also our first step towards becoming a developer.
HTML defines the structure and content of the webpage, while CSS enhances the style and appearance, and together, they create the webpages we see today.
In this chapter, we’ll explore the fundamentals of HTML and CSS, giving you the skills to start building your own webpages.
What is HTML?
HTML stands for HyperText Markup Language. It defines the structure of webpages using HTML elements.
To start writing HTML code, try the code demo below in the Code Playground:
<!DOCTYPE html>
<html lang="en">
  <head>
    <meta charset="UTF-8" />
    <meta name="viewport" content="width=device-width, initial-scale=1.0" />
    <title>Document</title>

    <link rel="stylesheet" href="/styles.css" />
  </head>

  <body>
    <p>Hello, World!</p>
  </body>
</html>
Modify the source code directly to see how it affects the webpage. For example, change the content between <p>...</p>:
<!DOCTYPE html>
<html lang="en">
  <head>
    <meta charset="UTF-8" />
    <meta name="viewport" content="width=device-width, initial-scale=1.0" />
    <title>Document</title>

    <link rel="stylesheet" href="/styles.css" />
  </head>

  <body>
    <p>Lorem ipsum dolor sit amet, consectetur adipiscing elit.</p>
  </body>
</html>
Click the Run button, and the webpage should be updated.
(Optional) Set up your computer
For the first chapter, you can test all the code snippets directly in the code playground. However, if you prefer setting up a local dev environment, here is how you can do it:
First, you'll need a code editor to write and edit your code.
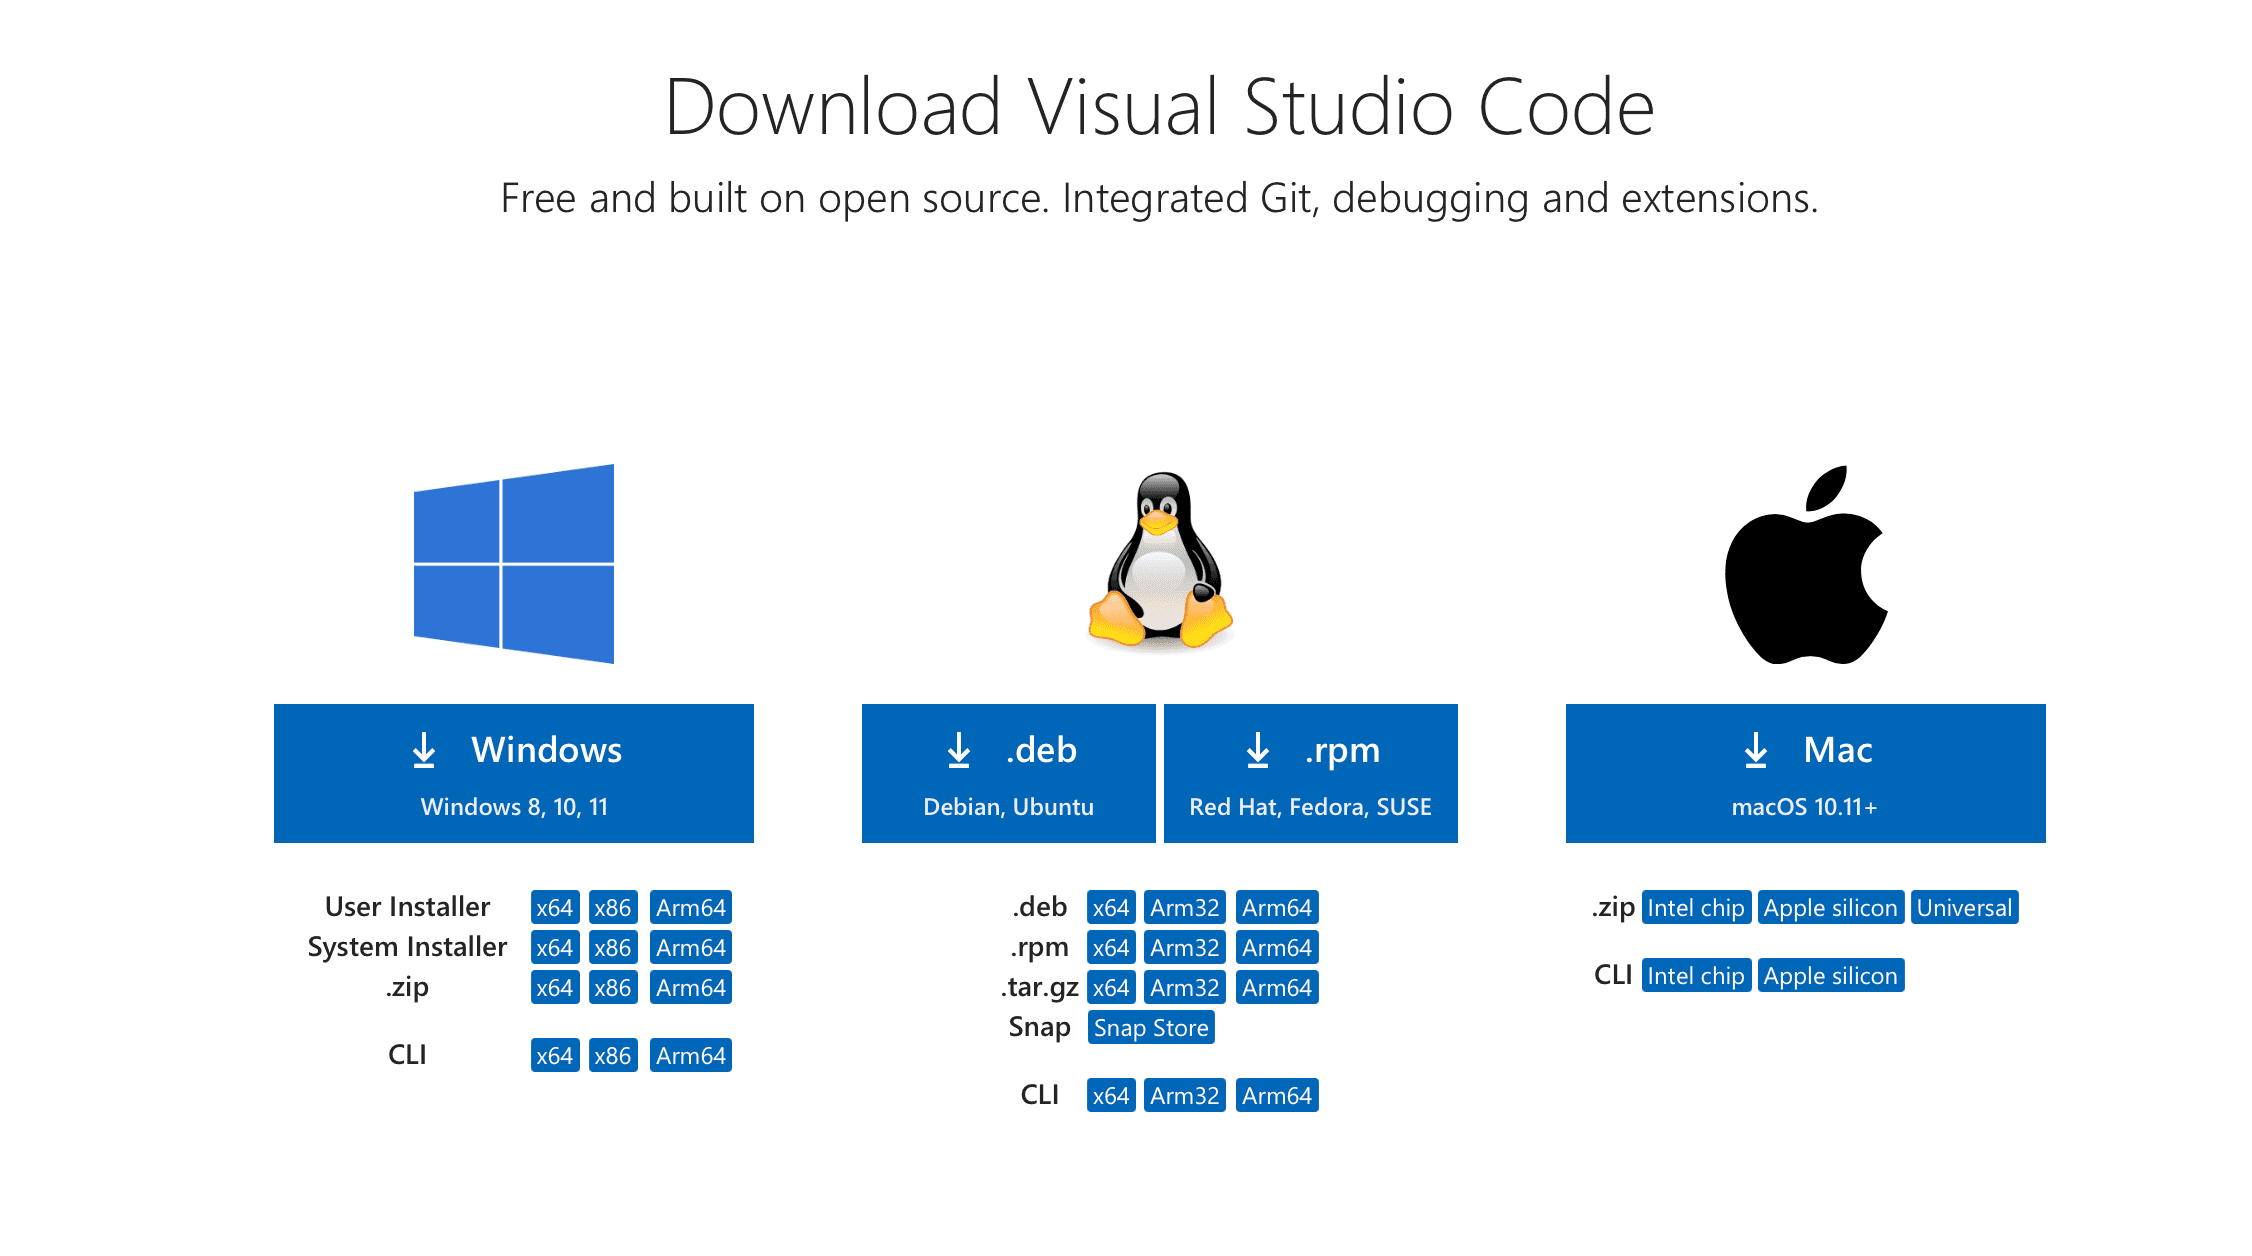
Visual Studio Code (VS Code) is a great option for beginners (and professionals, for that matter). Download the appropriate installer for your operating system from their official website.
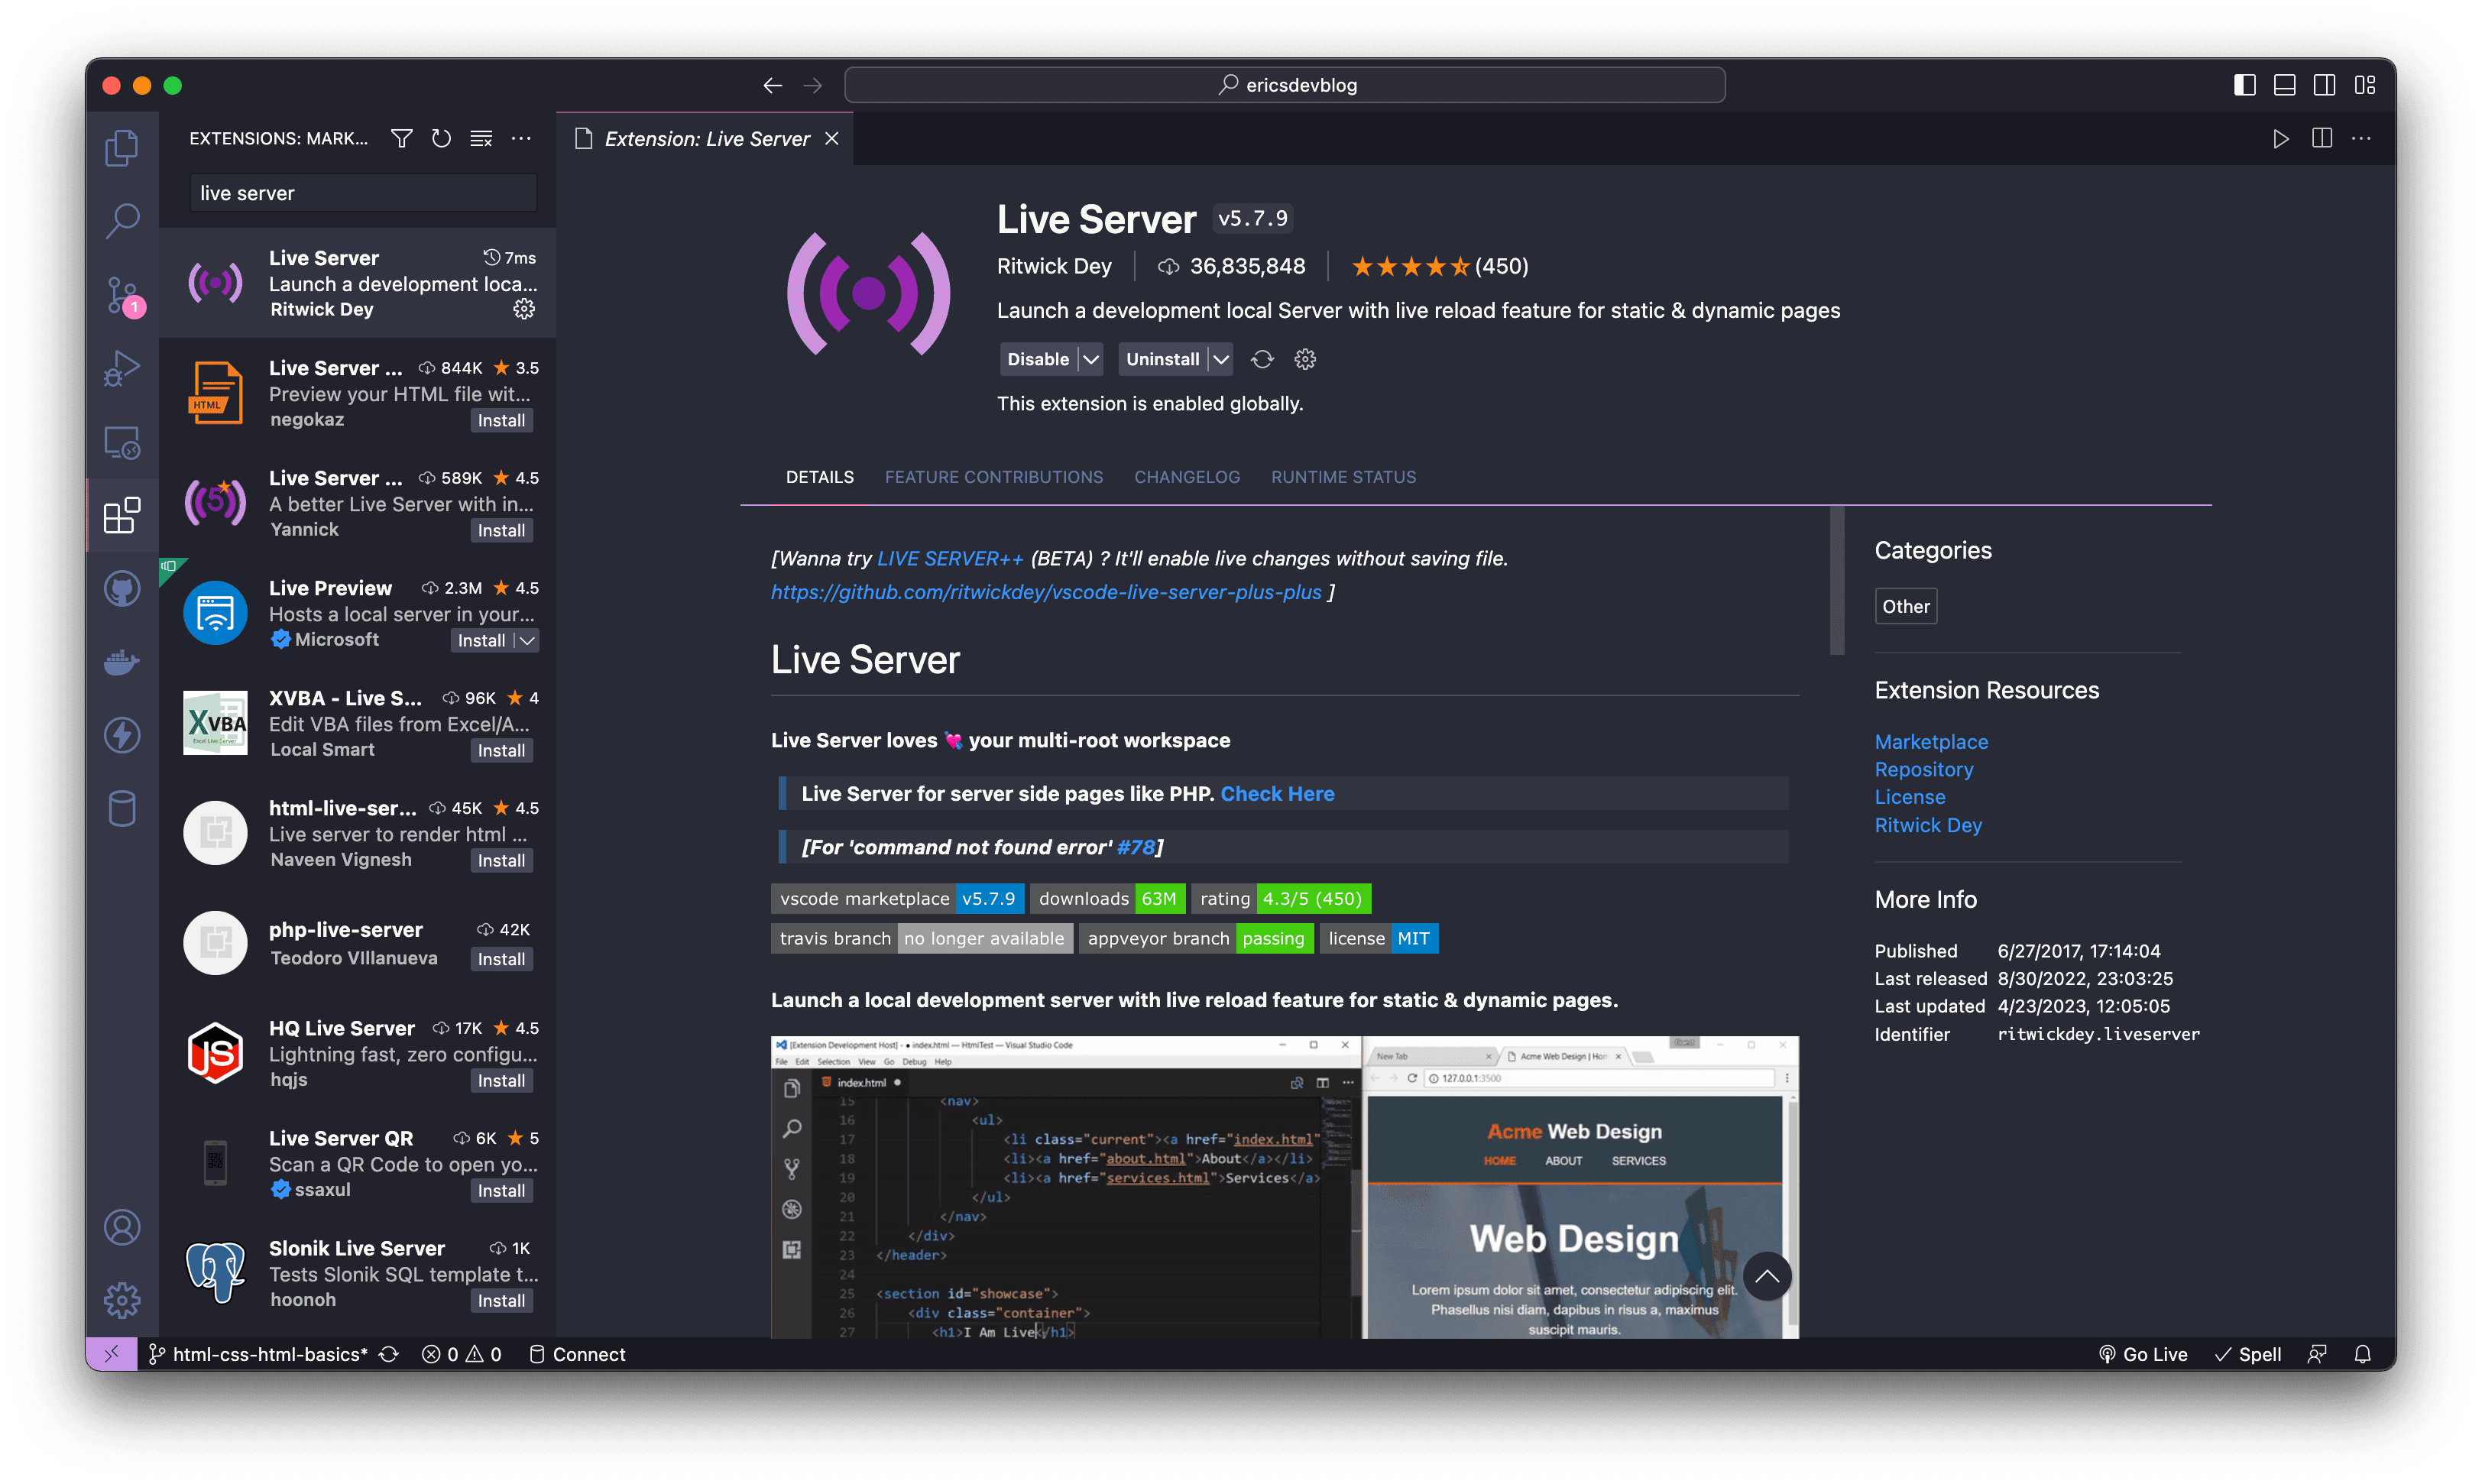
After you've installed VS Code, make sure to install the Live Server extension as well.
Navigate to the Extensions tab on the left sidebar, and type in Live Server in the search box.
From there, you'll be able to download and install the extension.
Live Server will create a local development server with the auto-reload feature.
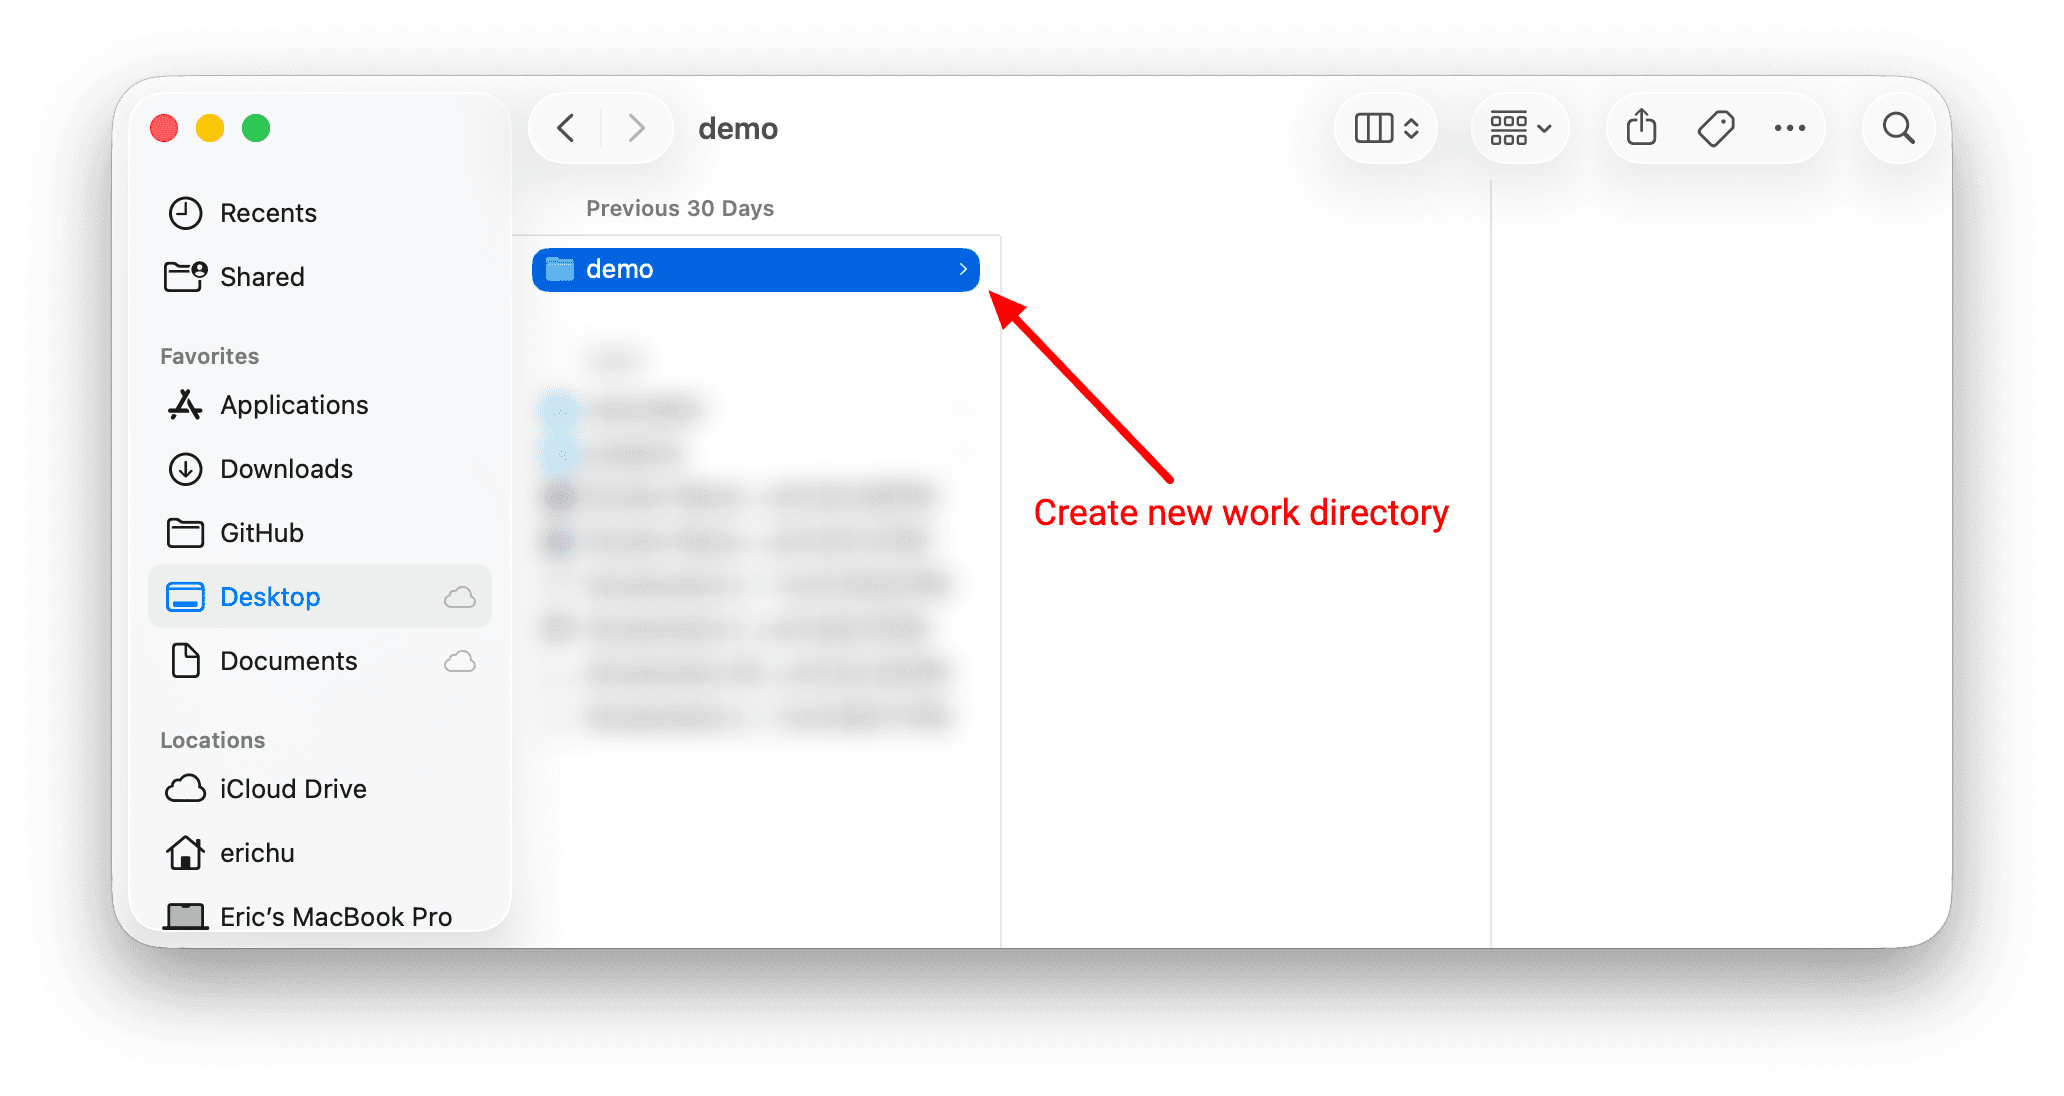
For example, go to your File Explorer, or Finder if you're using Mac, and create a new work directory:
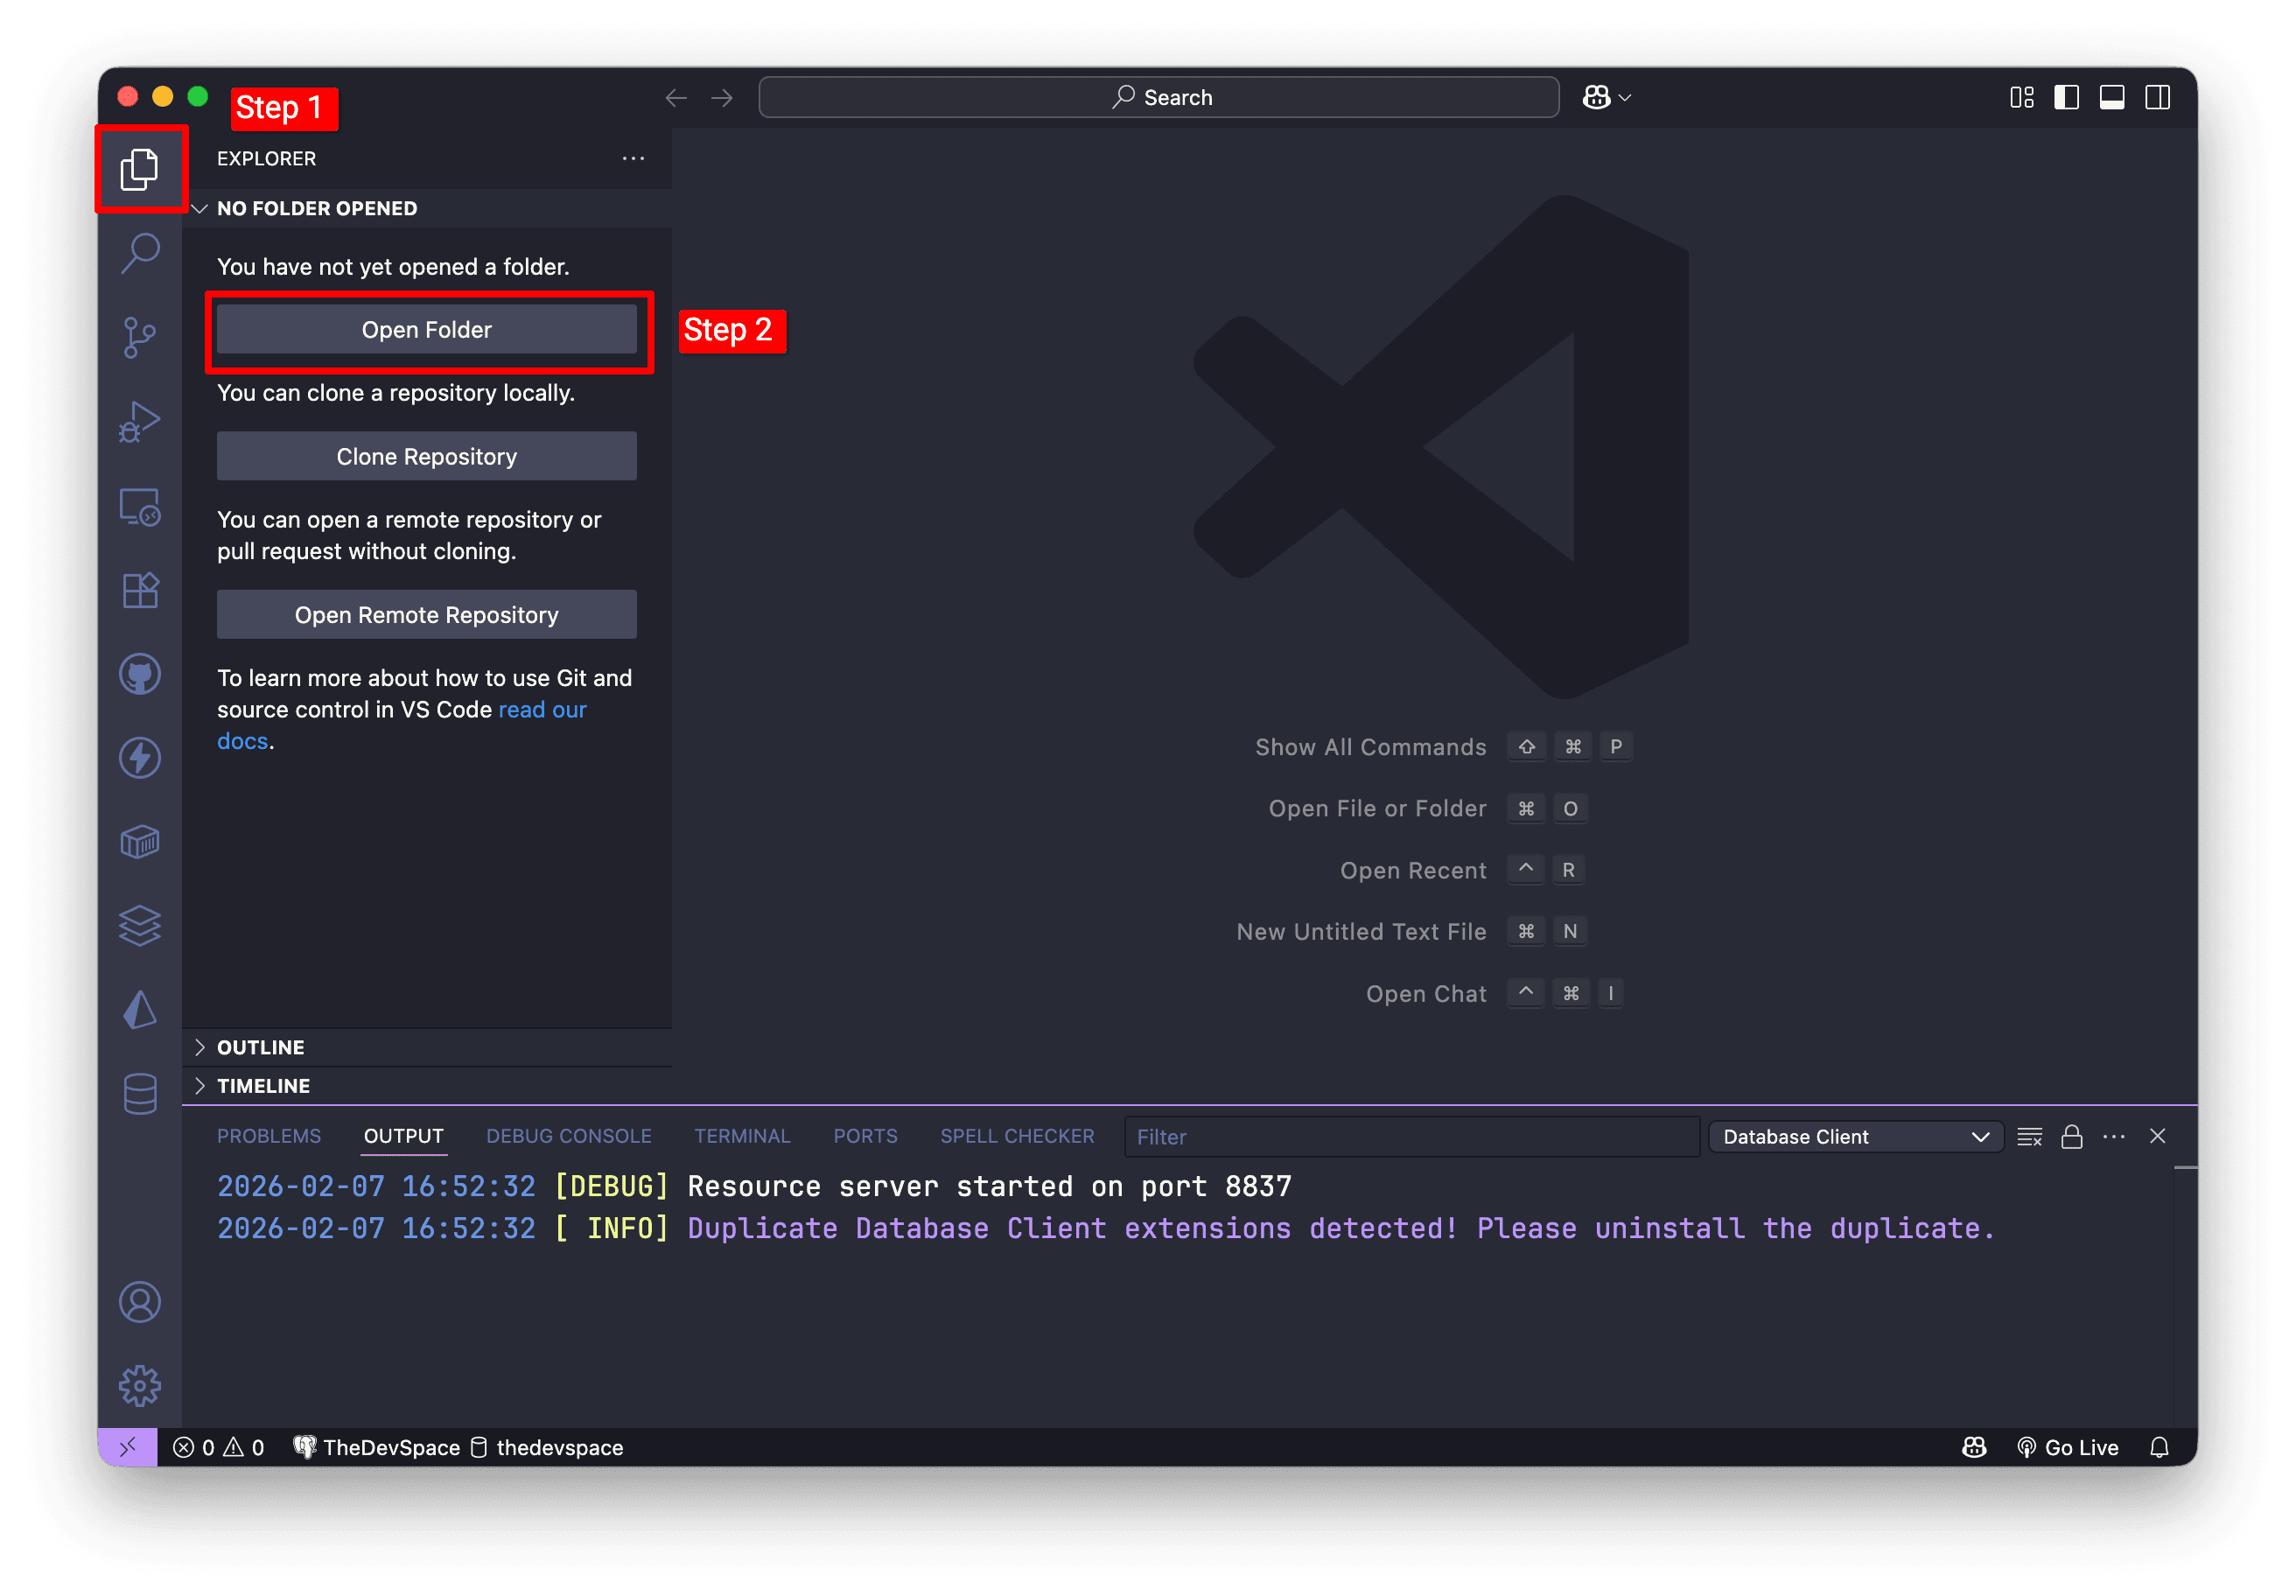
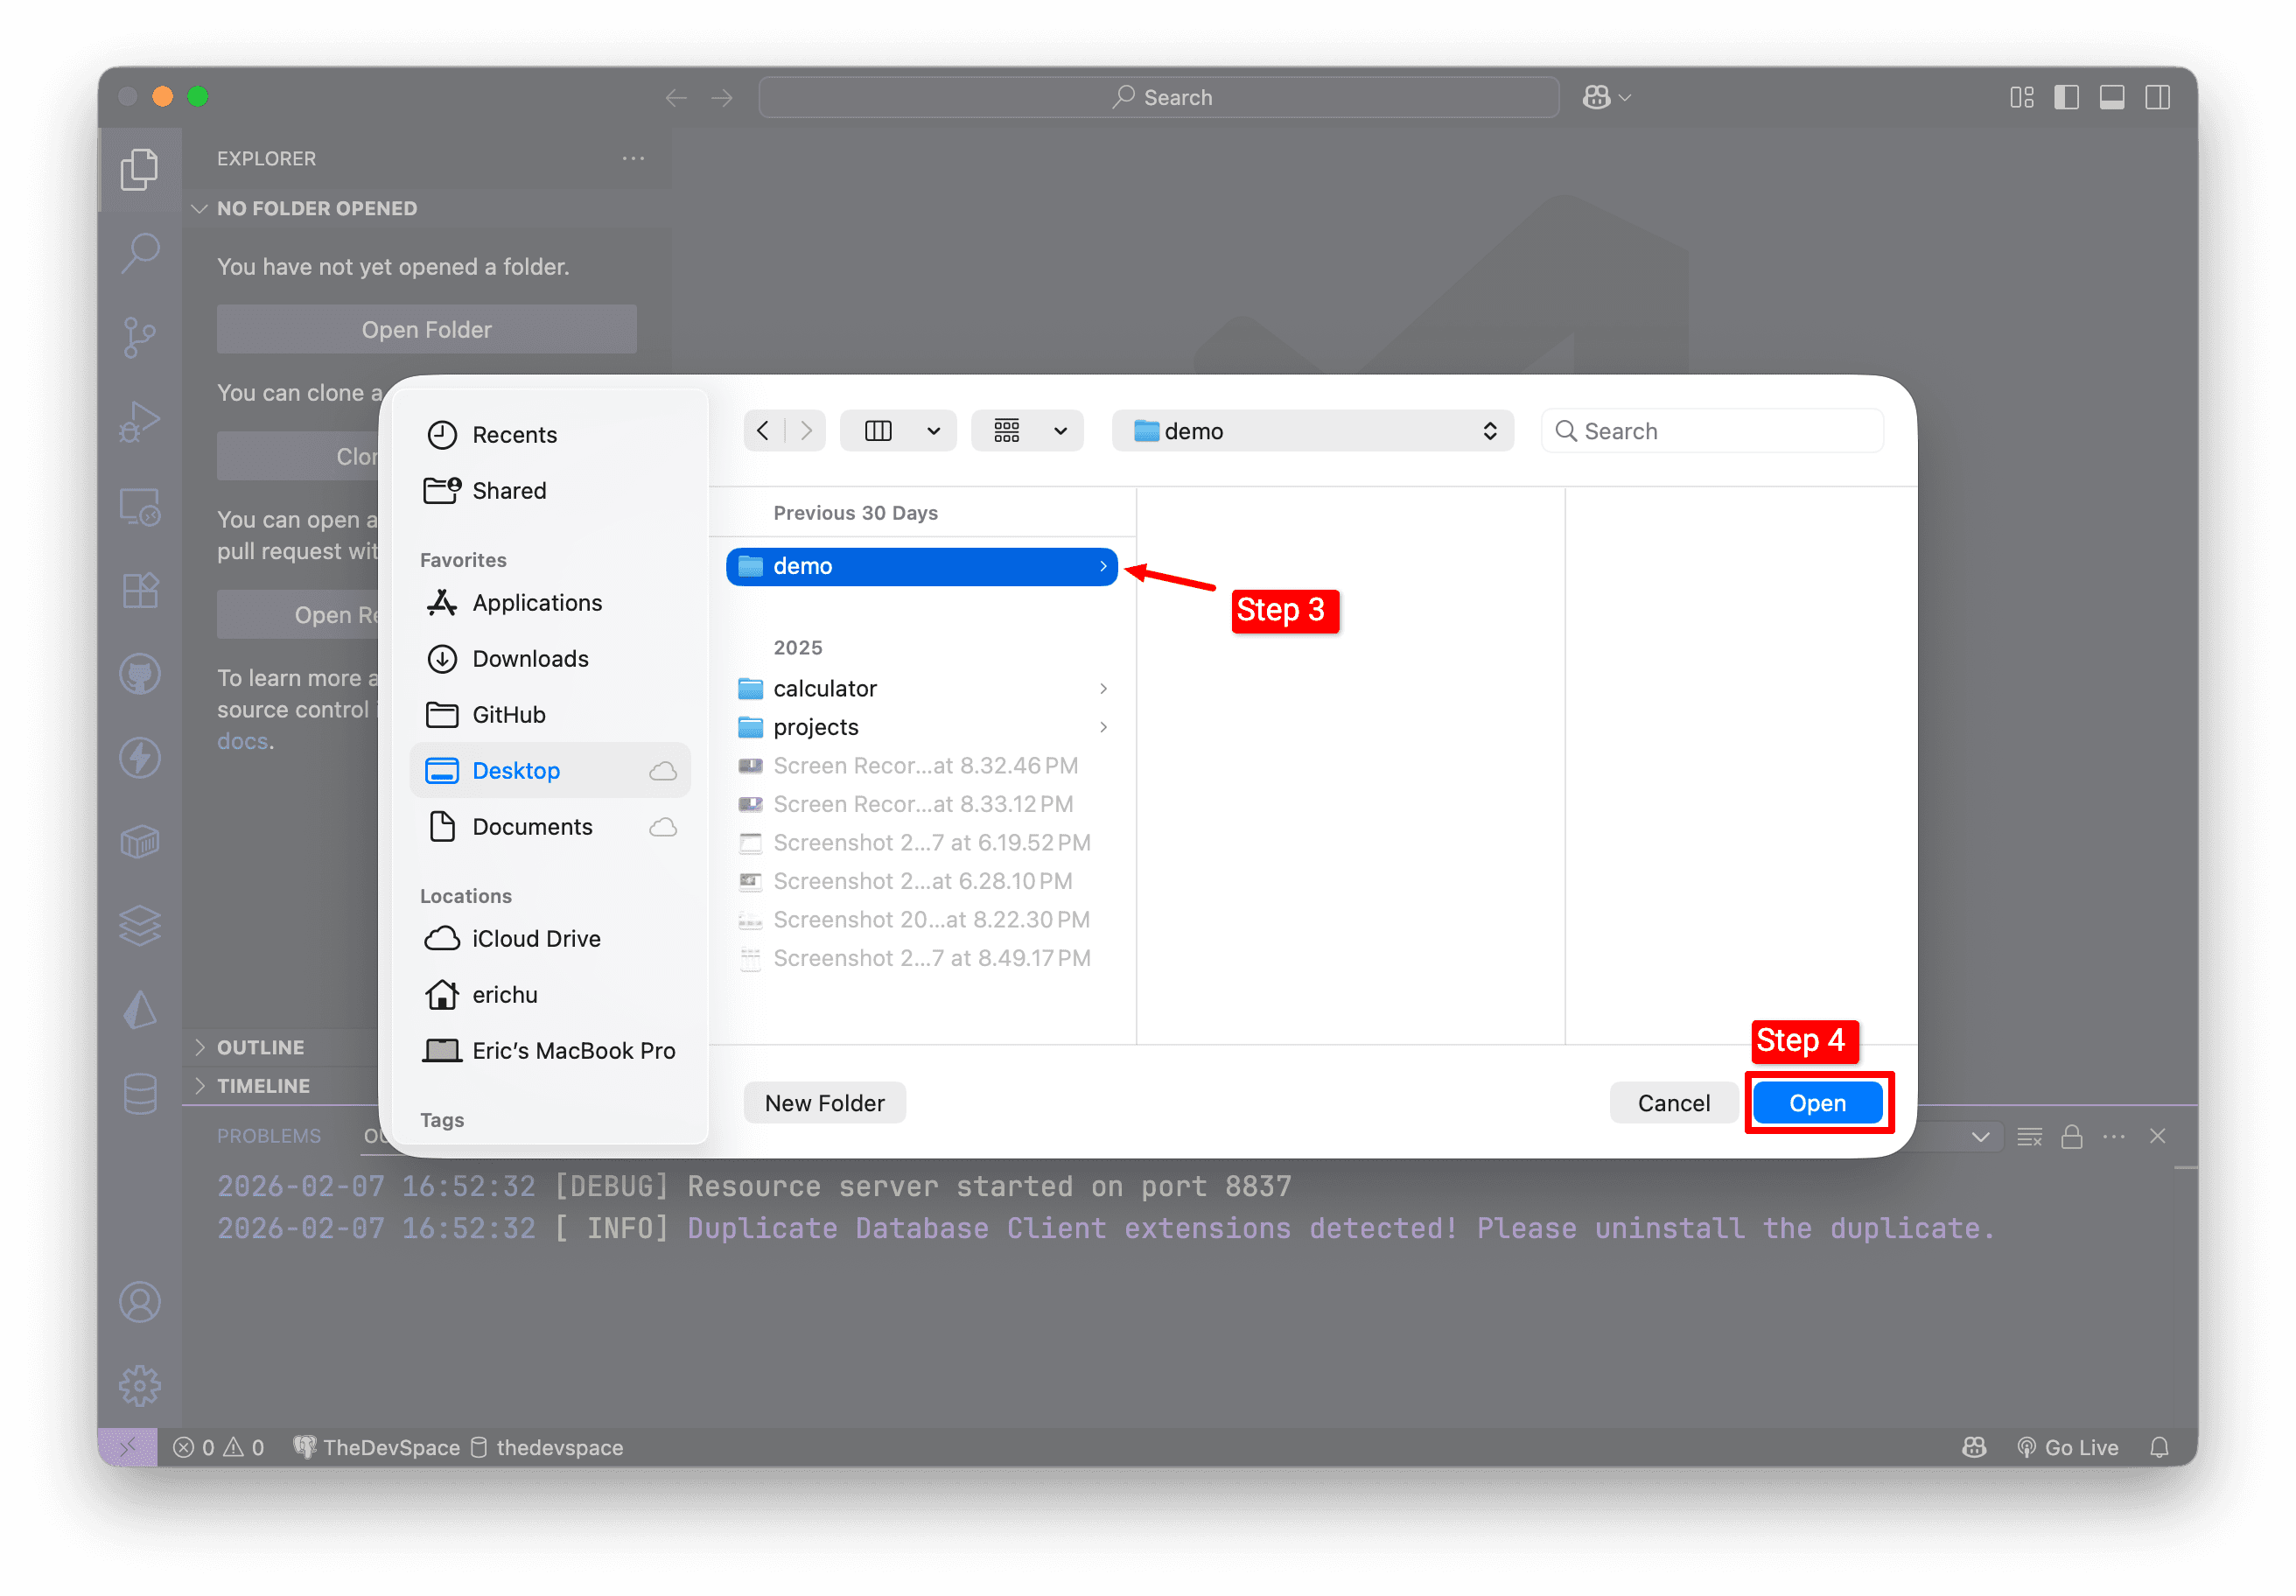
Then go to VS Code, go to the Explorer tab, and click Open Folder to open the work directory we just created:
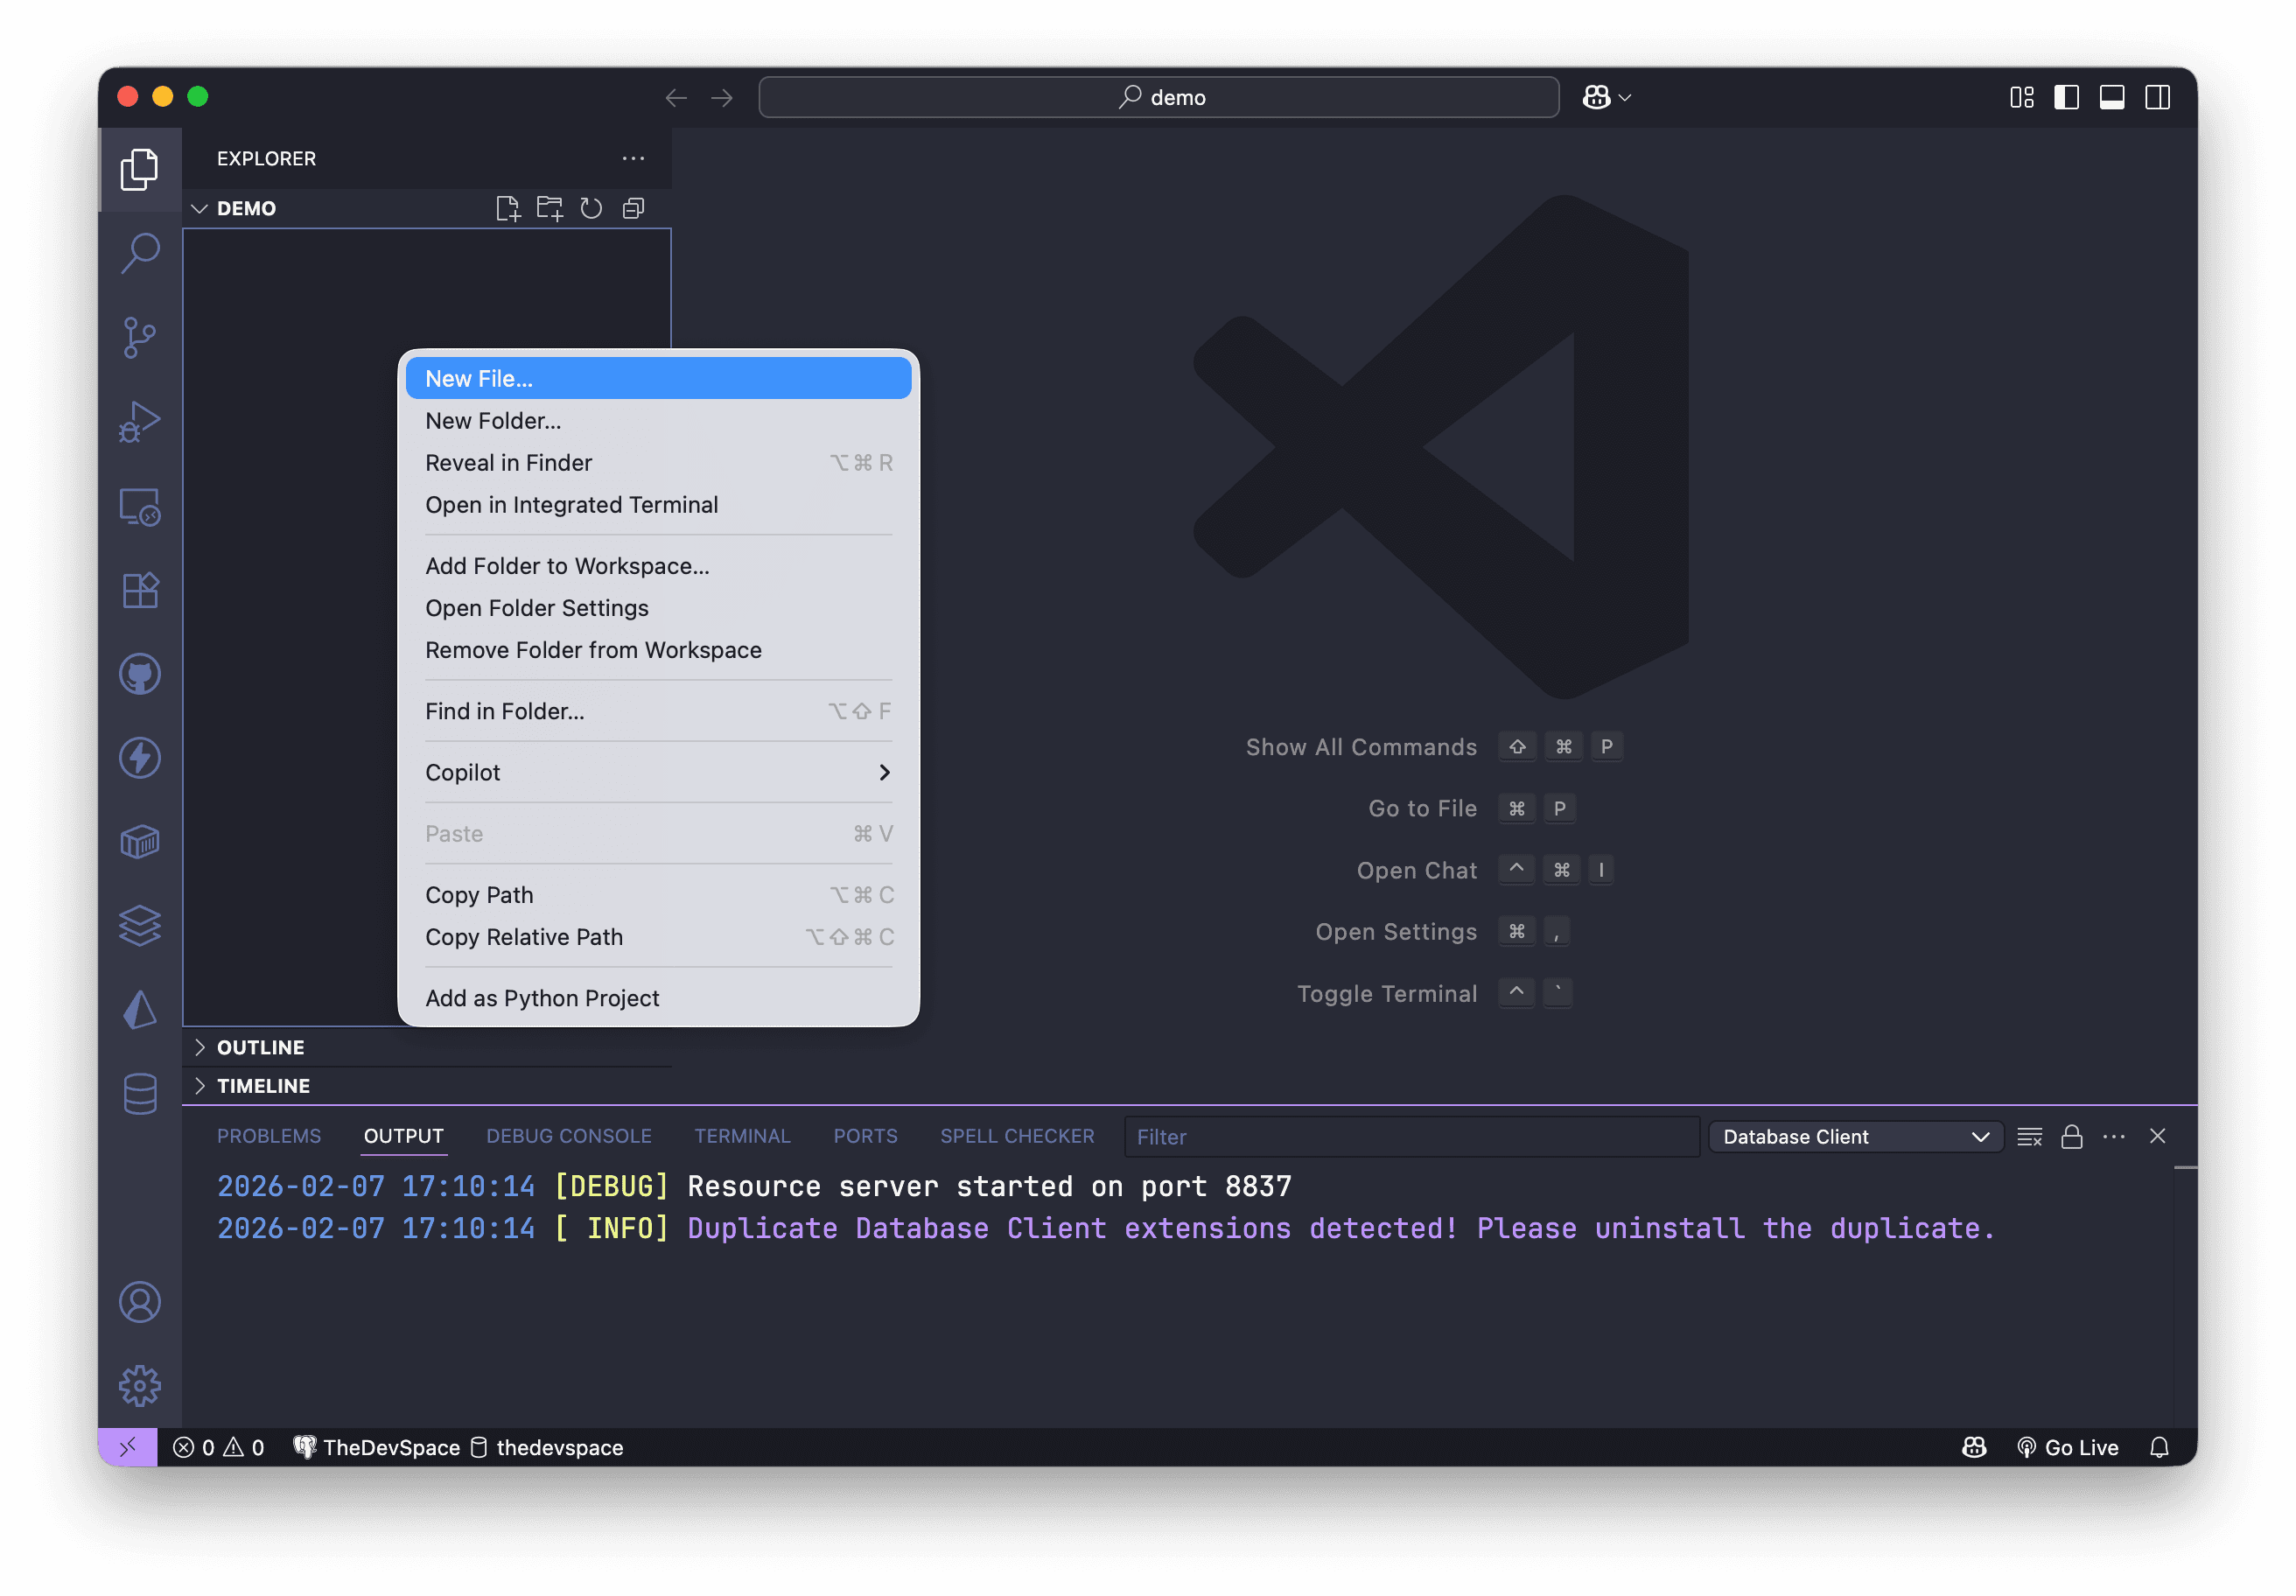
Right click and choose New File to create a new document. Named it index.html.
The .html extension indicates that this is an HTML document.
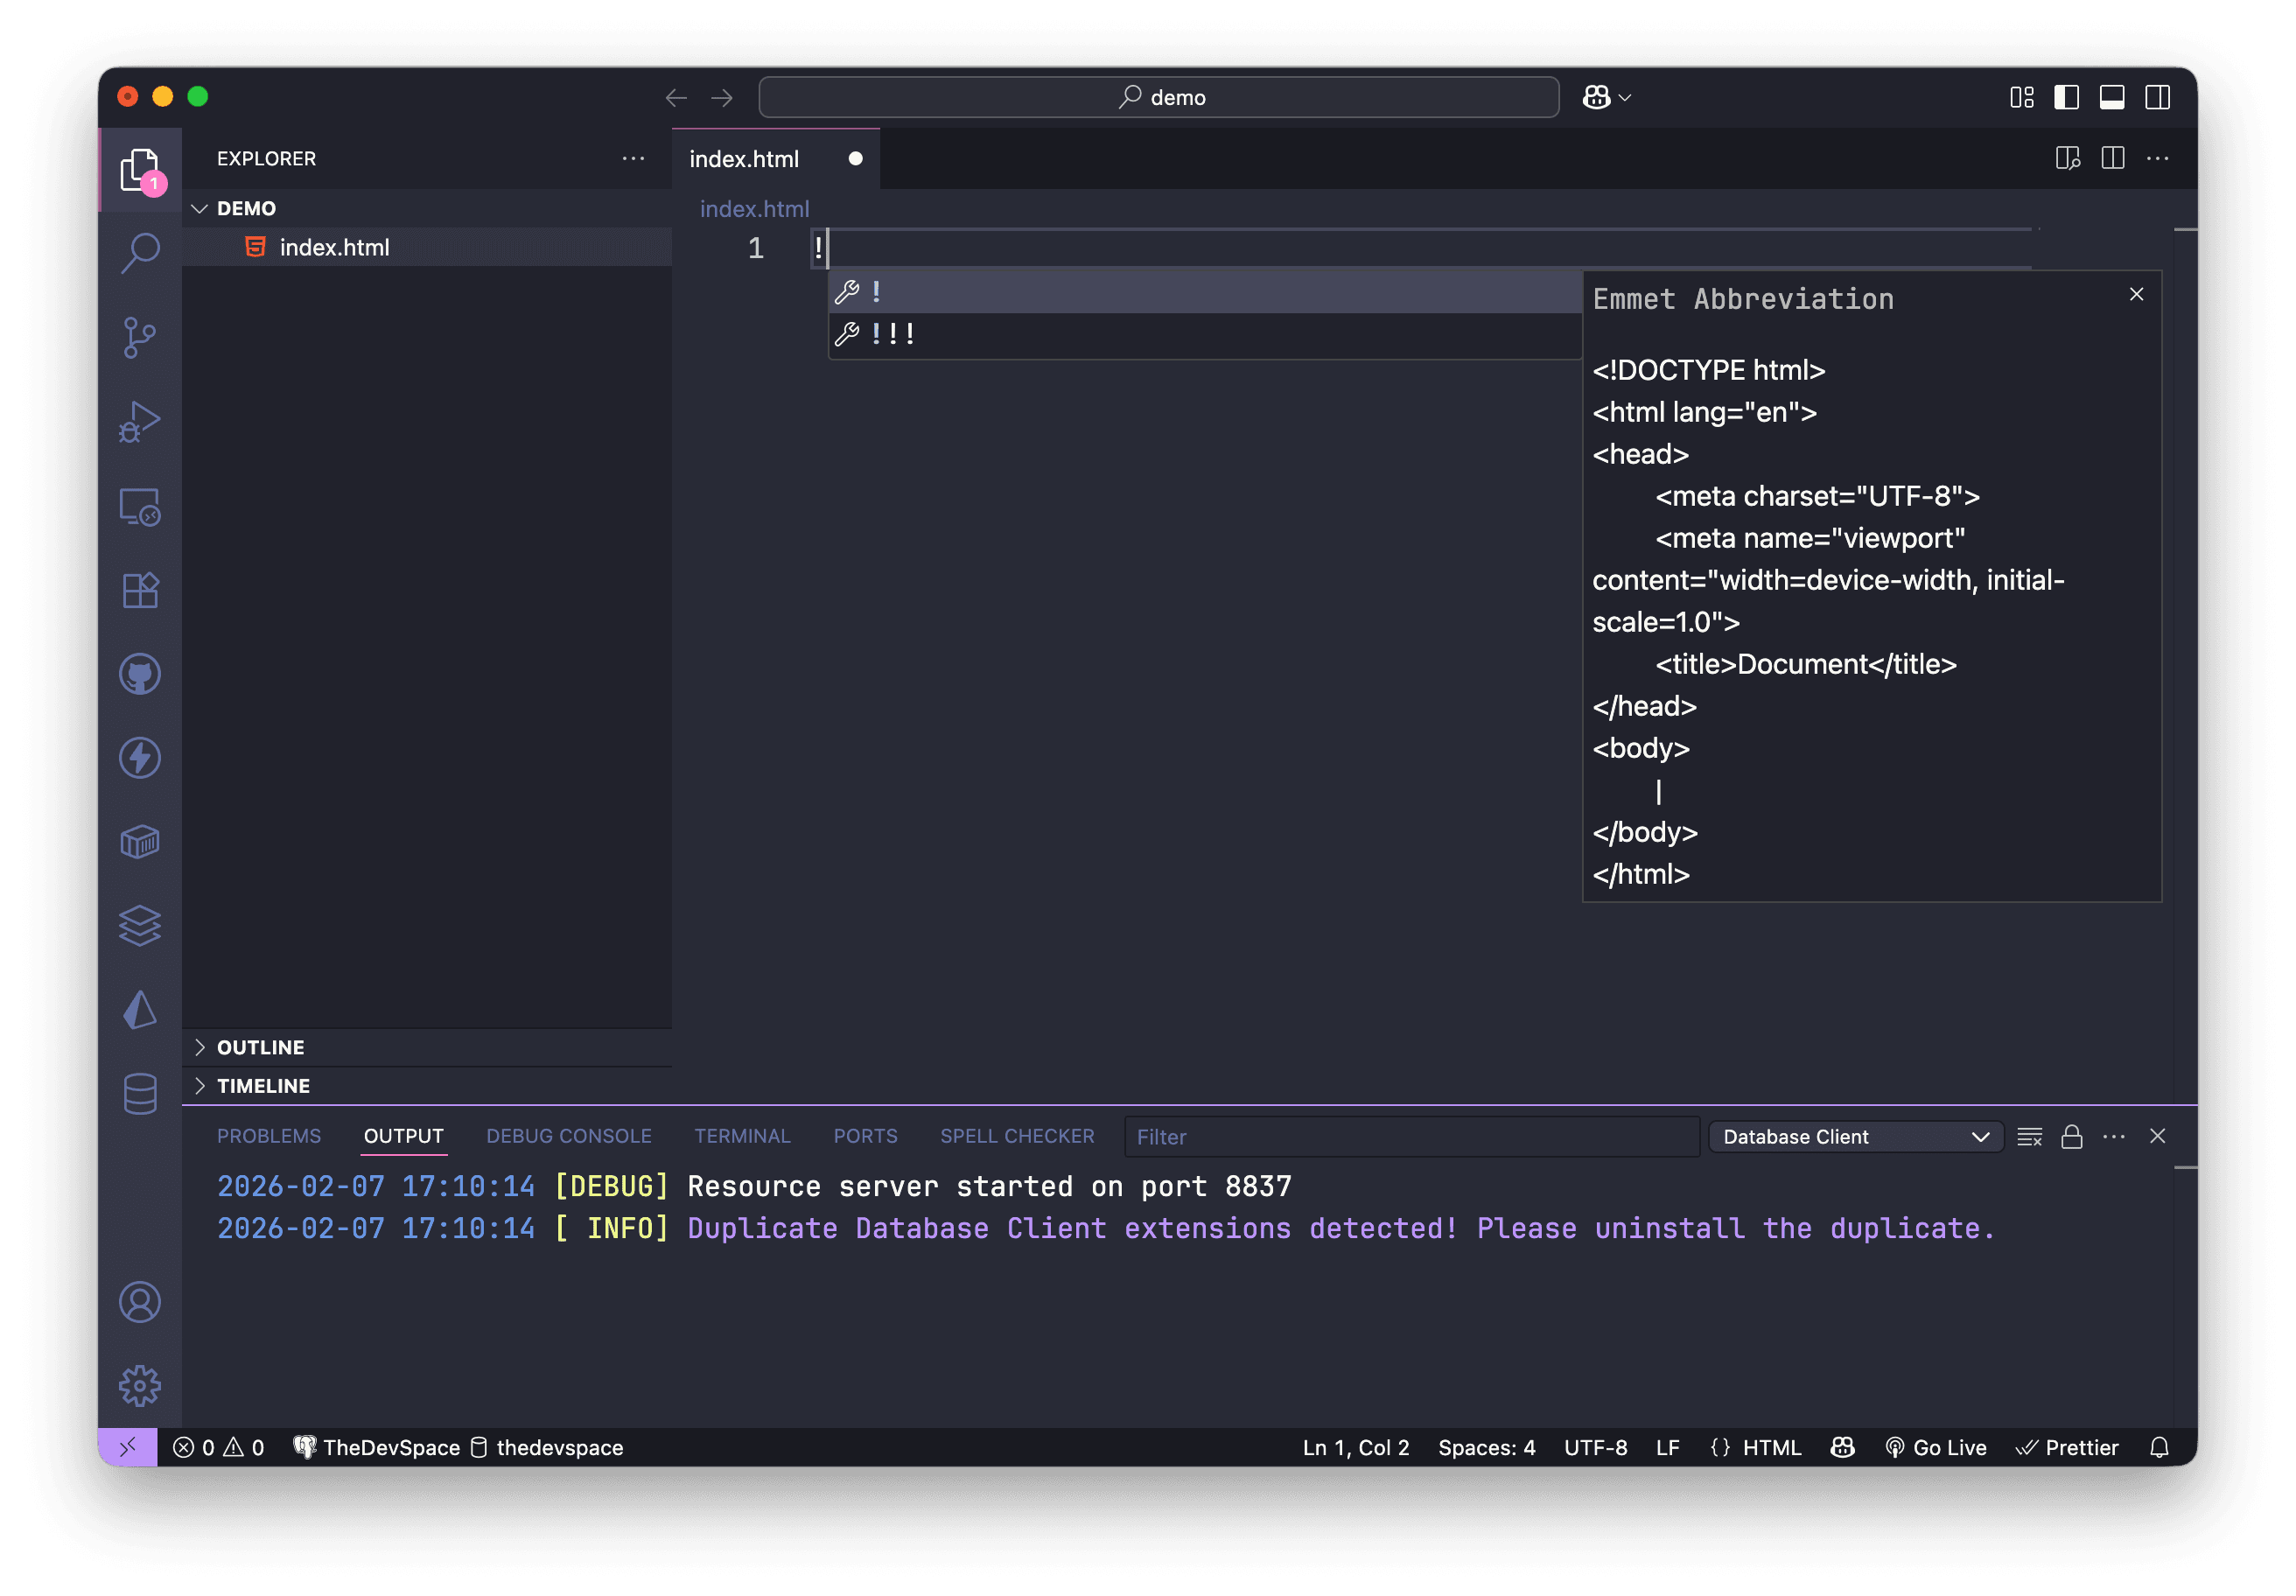
Type in ! in, and you will see suggestions like this:
This is a shortcut for creating HTML documents quickly. You can navigate between the suggested options with the ↑ or ↓ keys.
Select the first option, and the following code should be generated.
<!doctype html>
<html lang="en">
  <head>
    <meta charset="UTF-8" />
    <meta name="viewport" content="width=device-width, initial-scale=1.0" />
    <title>Document</title>
  </head>
  <body></body>
</html>
Notice that at the bottom right corner of the VS Code window, there is a Go Live button.
Clicking this button will activate the Live Server extension.
A local development server will be started, hosting the index.html file you just created.
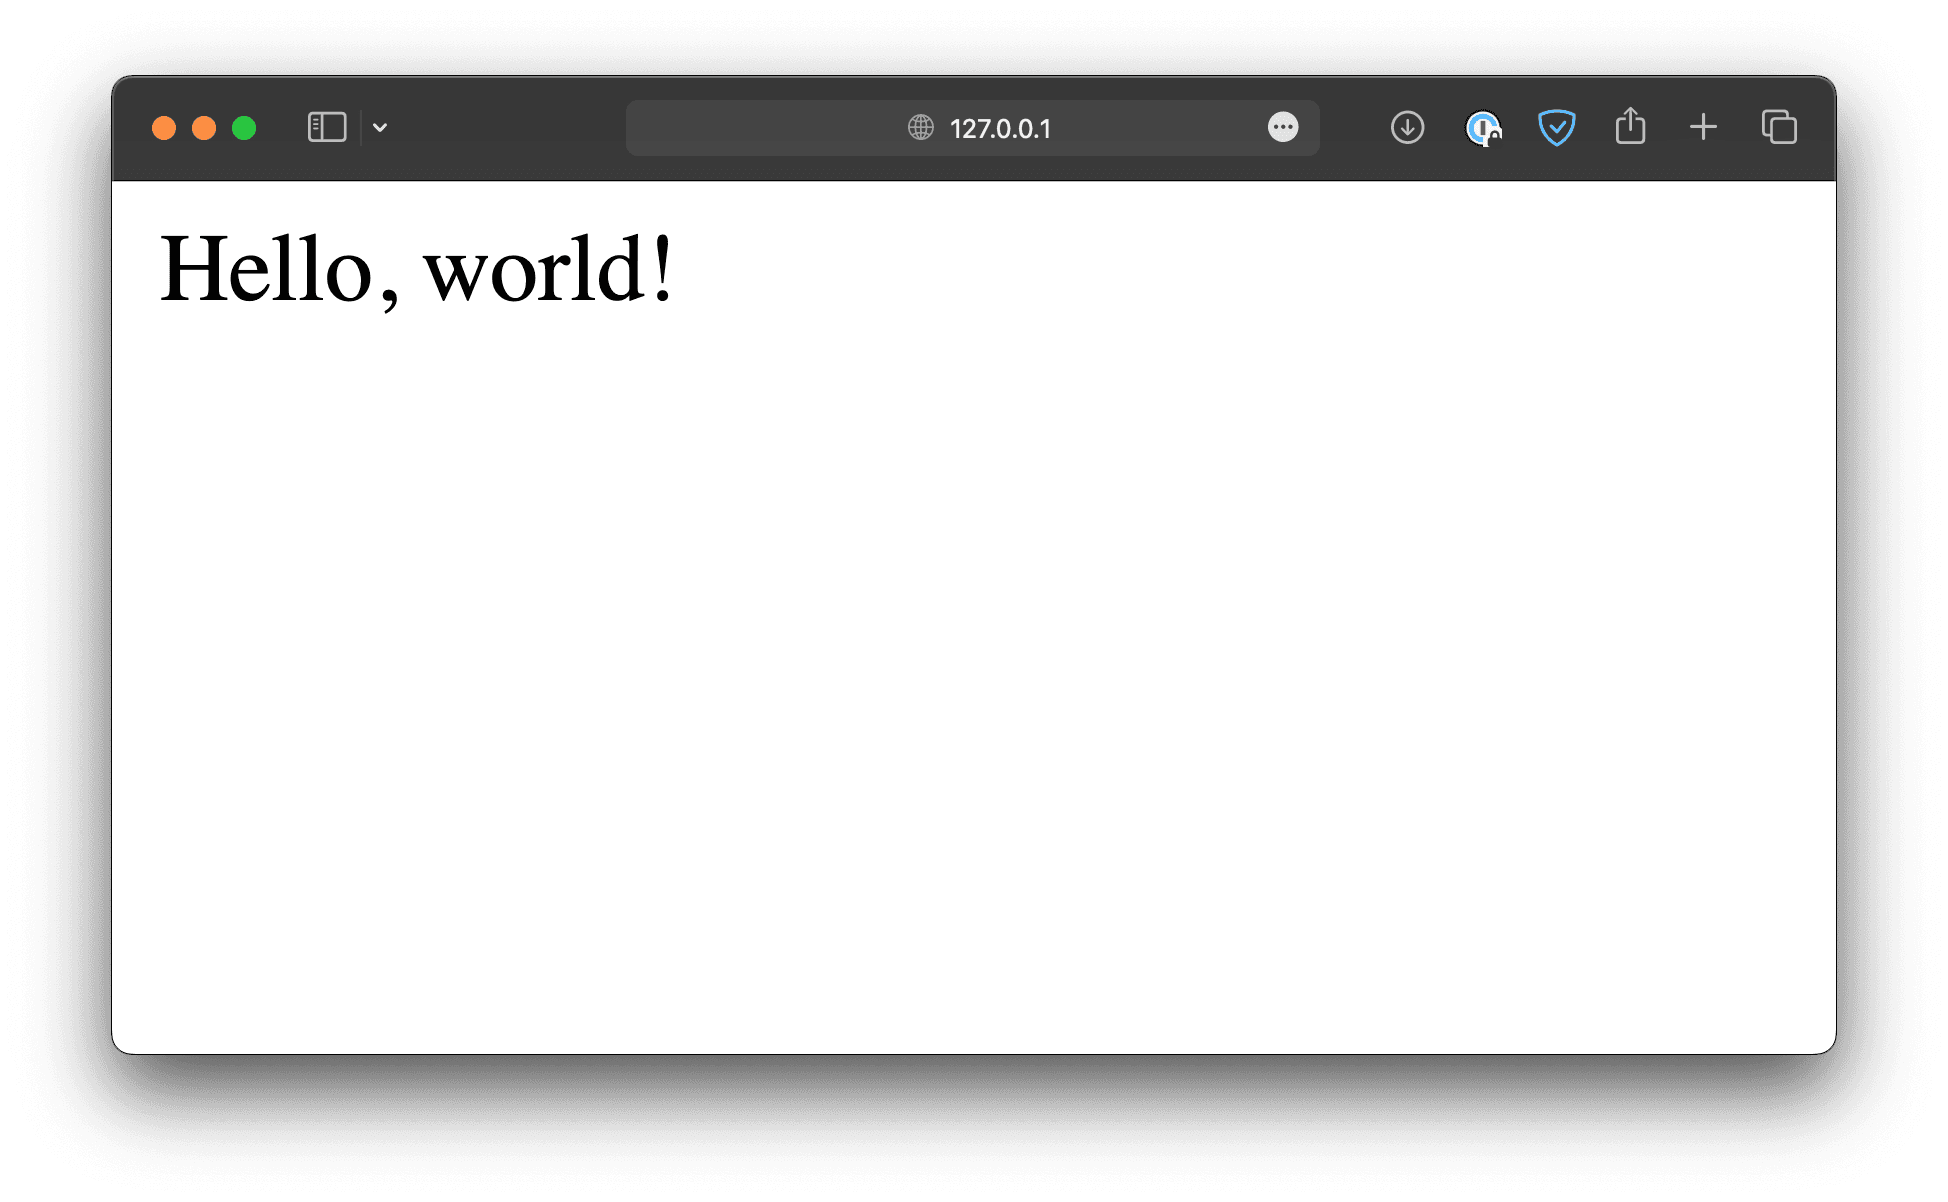
Of course, the file is still empty right now, so you can't see anything. Add something between the <body> and </body> tags.
<!doctype html>
<html lang="en">
  <head>
    <meta charset="UTF-8" />
    <meta name="viewport" content="width=device-width, initial-scale=1.0" />
    <title>Document</title>
  </head>
  <body>
    <p>Hello, world!</p>
  </body>
</html>
Save the changes, and the webpage will be automatically refreshed with the new content.
The structure of an HTML document
A typical HTML document always has the following structure:
<!DOCTYPE html>
<html lang="en">
  <head>
    <!-- . . . -->
  </head>
  <body>
    <!-- . . . -->
  </body>
</html>
The <!DOCTYPE html> tag defines the document type.
<!DOCTYPE html>
<html lang="en">
  <head>
    <!-- . . . -->
  </head>
  <body>
    <!-- . . . -->
  </body>
</html>
When the web browser encounters <!DOCTYPE html>, it understands that the page should be parsed and displayed according to the specifications of HTML5, the latest version of HTML standard.
This ensures that modern browsers interpret the webpage's content and layout correctly.
Everything else in the file should be enclosed inside an <html> element, defined by an opening tag (<html>) and a closing tag (</html>).
<!DOCTYPE html>
<html lang="en">
  <head>
    <!-- . . . -->
  </head>
  <body>
    <!-- . . . -->
  </body>
</html>
lang is called an attribute, and it has the value "en" in our example. This tells the browser as well as the search engine that English is the primary language used for this webpage.
<!DOCTYPE html>
<html lang="en">
  <head>
    <!-- . . . -->
  </head>
  <body>
    <!-- . . . -->
  </body>
</html>
Inside the <html> element, there are two child elements, <head> and <body>:
<!DOCTYPE html>
<html lang="en">
  <head>
    <!-- . . . -->
  </head>
  <body>
    <!-- . . . -->
  </body>
</html>
<head> contains metadata and other information about the HTML document. This information will not be displayed in the browser but is often used by search engines for SEO (Search Engine Optimization) purposes.
<body>, on the other hand, contains the main content of the webpage that is visible to the users, and for that reason, it is also the part of the HTML file we are going to focus on in this chapter.
<!DOCTYPE html>
<html lang="en">

<head>
  <meta charset="UTF-8">
  <meta name="viewport" content="width=device-width, initial-scale=1.0">
  <title>Document</title>

  <link rel="stylesheet" href="/styles.css">
</head>

<body>
  <p>Hello, World!</p>
</body>

</html>
